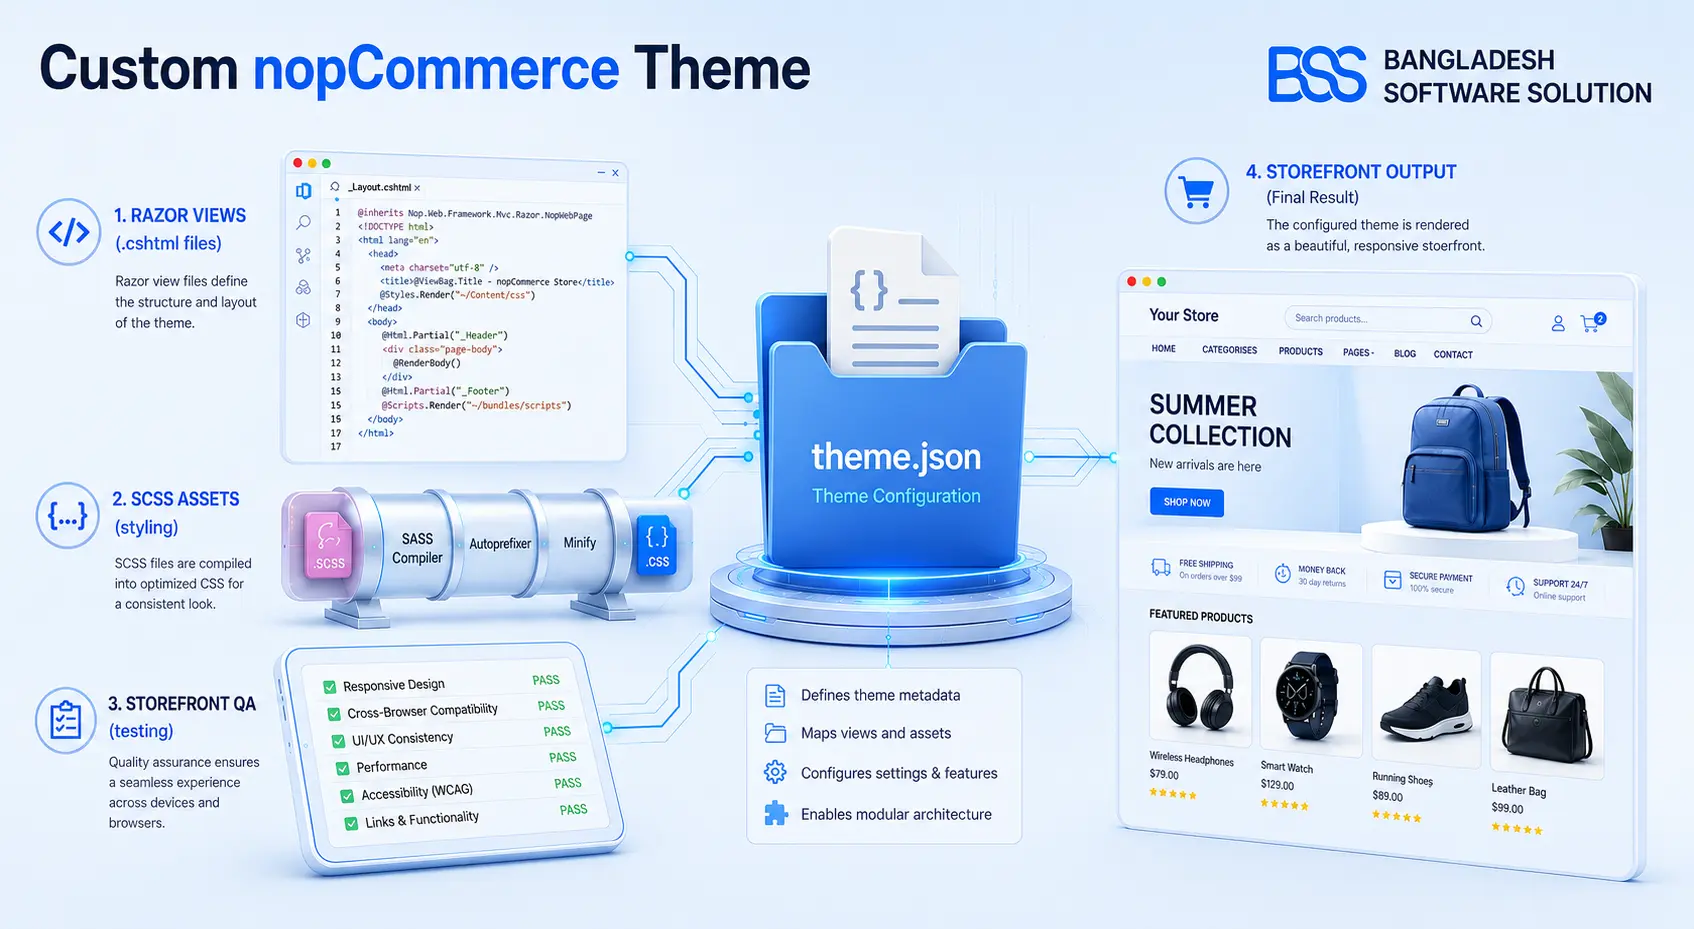
Learning how to create a custom NopCommerce theme is usually straightforward at the folder level, but easy to get wrong in production. The real work is deciding which Razor views to override, how to structure assets, how to keep upgrades manageable, and how to avoid turning a theme into a fragile copy of the whole storefront.
In our deployments, the strongest themes are built as thin, deliberate overrides. We keep the base nopCommerce behavior intact where possible, move brand-specific presentation into the theme, and test checkout, account pages, product pages, category pages, mobile navigation, and performance before launch.
This guide walks through a practical build path for developers: theme folder setup, theme.json, layout strategy, nopCommerce Razor views, SCSS/CSS organization, QA, and when a custom theme should be paired with plugins or professional implementation.
What a nopCommerce Theme Actually Controls
According to the official nopCommerce Designer's Guide, themes live under the /Themes/ folder and define the consistent layout and appearance of the public store. A theme usually includes style sheets, images, scripts, views, and configuration metadata.
The important boundary is this: a theme should control presentation, not core business logic. If a feature needs new admin settings, new database behavior, payment logic, shipping logic, or custom services, that work belongs in a plugin or application customization, not only in theme files.
If you are still choosing between basic theme installation and a full custom build, the earlier guide on how to install and change a theme in nopCommerce is a useful starting point before you begin source-level work.
Set Up the Theme Folder and theme.json
Official nopCommerce documentation describes the common starting method: copy an existing theme, rename the folder, then update theme.json. That is still the safest path for most teams because it starts from a known working structure.
In source code projects, theme work is typically under Presentation/Nop.Web/Themes/. In a deployed web version, look under the site's Themes folder. Use a simple, stable folder name because it becomes part of asset paths and team communication.
/Themes/
  BssCustomTheme/
    theme.json
    Content/
      css/
      images/
      js/
    Views/
      Shared/
      Catalog/
      Customer/
      Checkout/
A minimal theme.json should identify the theme clearly. Keep the visible title business-friendly, but keep the folder and system naming developer-friendly.
{
  "Title": "BSS Custom Theme",
  "SupportRTL": true,
  "PreviewImageUrl": "~/Themes/BssCustomTheme/preview.png",
  "PreviewText": "A custom nopCommerce storefront theme built for the brand."
}
Insider insight: do not copy every view on day one
A common mistake we see when auditing theme projects is a full copy of many default views before the team knows what will actually change. That makes future nopCommerce upgrades harder because every copied view becomes a file you must compare and retest later.
Plan Your nopCommerce Razor Views and Layout Overrides
nopCommerce uses Razor layouts to keep the public store consistent. The official layout documentation describes shared layouts such as _Root.cshtml, _ColumnsOne.cshtml, and _ColumnsTwo.cshtml, with shared views commonly living under Views/Shared.
When you build custom theme nopCommerce views, start with pages that create measurable business value: header, footer, category listing, product detail page, cart, checkout, login, registration, customer account, and any B2B or wholesale-specific view.
For developer teams, the article Developers Choose NopCommerce gives more architectural context about why nopCommerce's .NET and plugin model matter when theme work crosses into code behavior.
Build the SCSS, CSS, and JavaScript Workflow
nopCommerce themes can use plain CSS, but larger storefronts benefit from a structured nopCommerce Scss workflow. The practical pattern is to keep source SCSS files in a maintainable folder, compile them into final CSS inside the theme, then load only the compiled output in production.
Keep your SCSS organized by foundations, layout, components, pages, and utilities. Avoid one giant style file where checkout rules, button styles, responsive navigation, and product-card variants all compete for priority.
Content/
  scss/
    _tokens.scss
    _layout.scss
    _buttons.scss
    _product-card.scss
    _checkout.scss
    theme.scss
  css/
    theme.css
    theme.min.css
For scripts, keep interactions small and test them inside real nopCommerce pages. A menu animation that works on a static mockup may fail after Ajax cart updates, quick view widgets, or plugin-injected checkout elements.
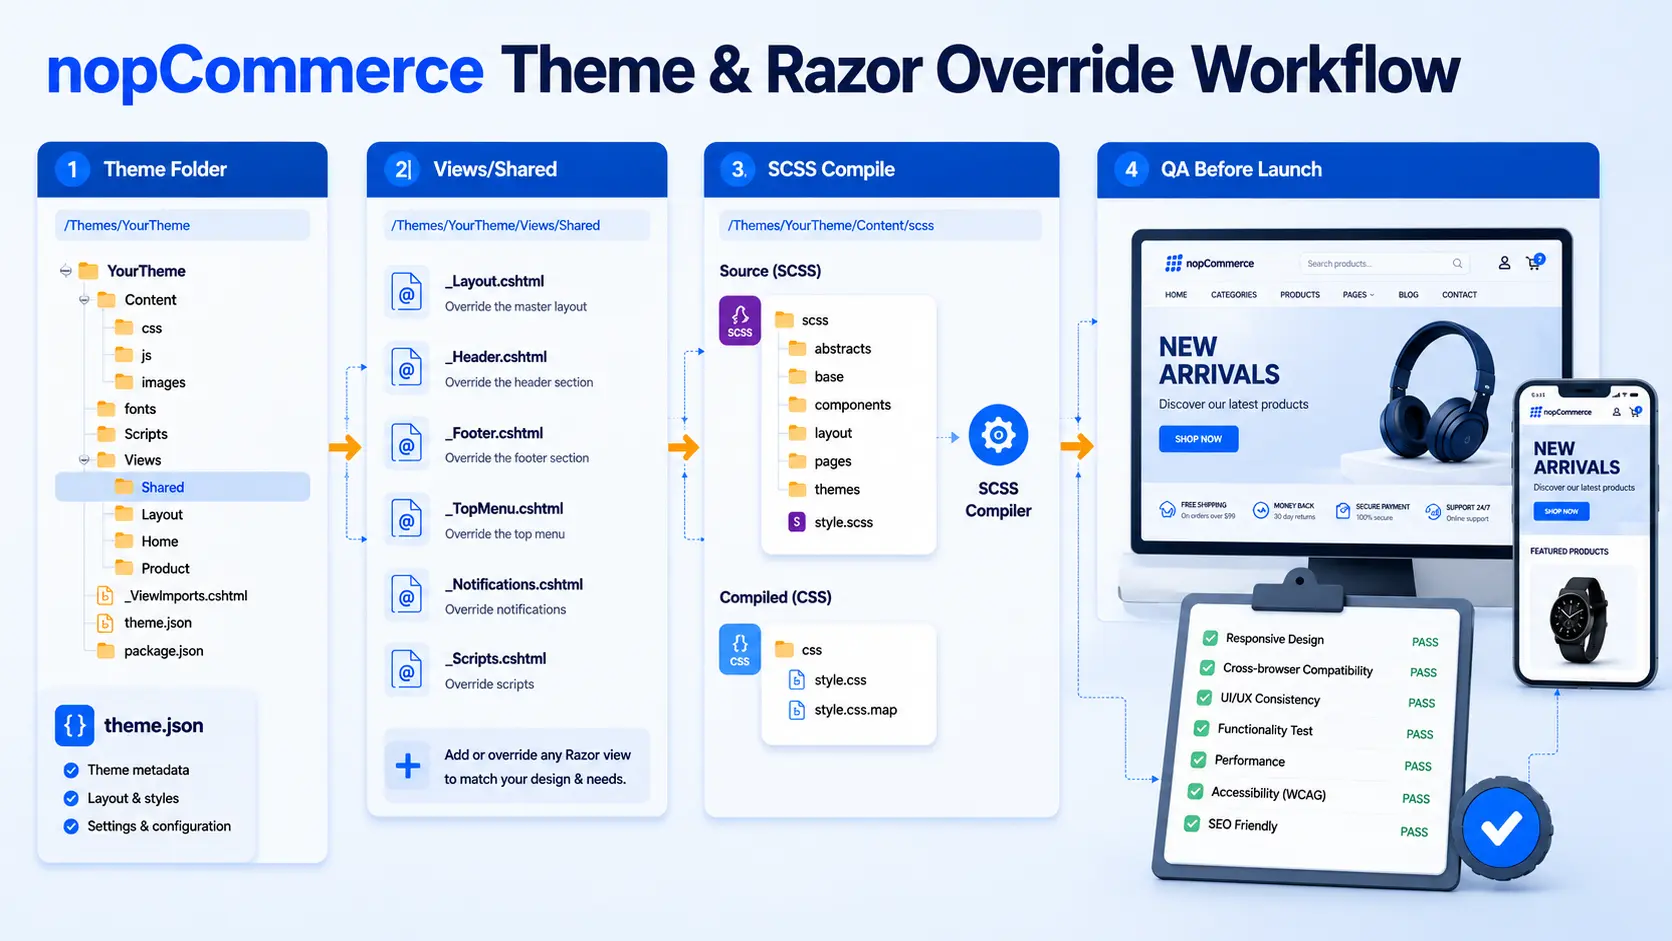
Choose the Right Build Approach
There is no single right way to build a theme. The best approach depends on budget, timeline, design complexity, custom checkout needs, and how much your team can maintain after launch.
| Approach | Pros | Cons | Best fit |
|---|---|---|---|
| Manual DIY theme | Lowest direct cost, good learning path, full control over visual edits. | High risk of messy overrides, weak QA, and harder upgrades if files are copied broadly. | Small stores with developer time |
| Custom engineering from scratch | Best control over Razor views, design system, responsive behavior, and edge cases. | Higher cost and requires disciplined version control, testing, and release management. | Brands with unique UX or B2B flows |
| Specialized implementation support | Faster path with experienced theme architecture, compatibility checks, and launch support. | Requires clear scope, design assets, and technical ownership after handoff. | Stores that need production-ready delivery |
BSS usually helps when a theme needs more than color changes: custom product layouts, responsive checkout polish, B2B catalog behavior, plugin styling, performance cleanup, or upgrade-safe Razor view planning. Our nopCommerce services page is the most relevant next step when you need implementation support rather than only guidance.
Test the Theme Before Launch
A custom theme can look complete while still failing under real customer behavior. Test across device sizes, browsers, logged-in and guest flows, tax and shipping combinations, empty states, validation errors, search results, customer account pages, and checkout payment failures.
If the store uses RTL languages, review your direction handling early instead of treating it as a final CSS patch. The related guide on adding RTL support to a nopCommerce theme is useful if your theme must support right-to-left storefronts.
Custom nopCommerce theme launch checklist
- 1Create a dedicated theme folder, update theme.json, and apply the theme in a staging store first.
- 2Override only the Razor views you actually need, and document why each copied view exists.
- 3Compile SCSS into production CSS, minify assets, and remove unused experimental files before launch.
- 4Test homepage, category, product, search, cart, checkout, account, order history, contact, and error states.
- 5Check mobile navigation, forms, product images, price display, validation messages, and plugin-injected UI.
- 6Run performance checks for CSS size, unused JavaScript, image weight, layout shift, and render-blocking assets.
- 7Keep a rollback copy of the previous theme and confirm the admin can switch themes if launch issues appear.
Theme work also intersects with upgrades. Before a major version change, use a staging environment and follow a structured process like the nopCommerce upgrade checklist so your custom views do not silently drift from the platform.
Need a Custom nopCommerce Theme Built Properly?
BSS can help design and implement upgrade-aware nopCommerce themes with Razor view planning, SCSS architecture, responsive QA, plugin styling, and launch support.
Frequently Asked Questions
Final Thoughts
To create a custom NopCommerce theme successfully, treat the theme as a disciplined presentation layer. Start from a clean folder, configure theme.json, override Razor views only when needed, organize SCSS and assets carefully, and test the real commerce journey before launch.
Reference points checked: official nopCommerce Designer's Guide, official theme creation documentation, official layout documentation, official theme customization documentation, and official nopCommerce development requirements. They are named in plain text to keep this article free of third-party outbound links.