BSS Anywhere Carousels
Created on: Mar 02, 2026
PRE-REQUISITES
-
The plugin requires you to install the BSS Core plugin first.
INSTALLATION
-
Go to the Order Details Page and Download plugin package
-
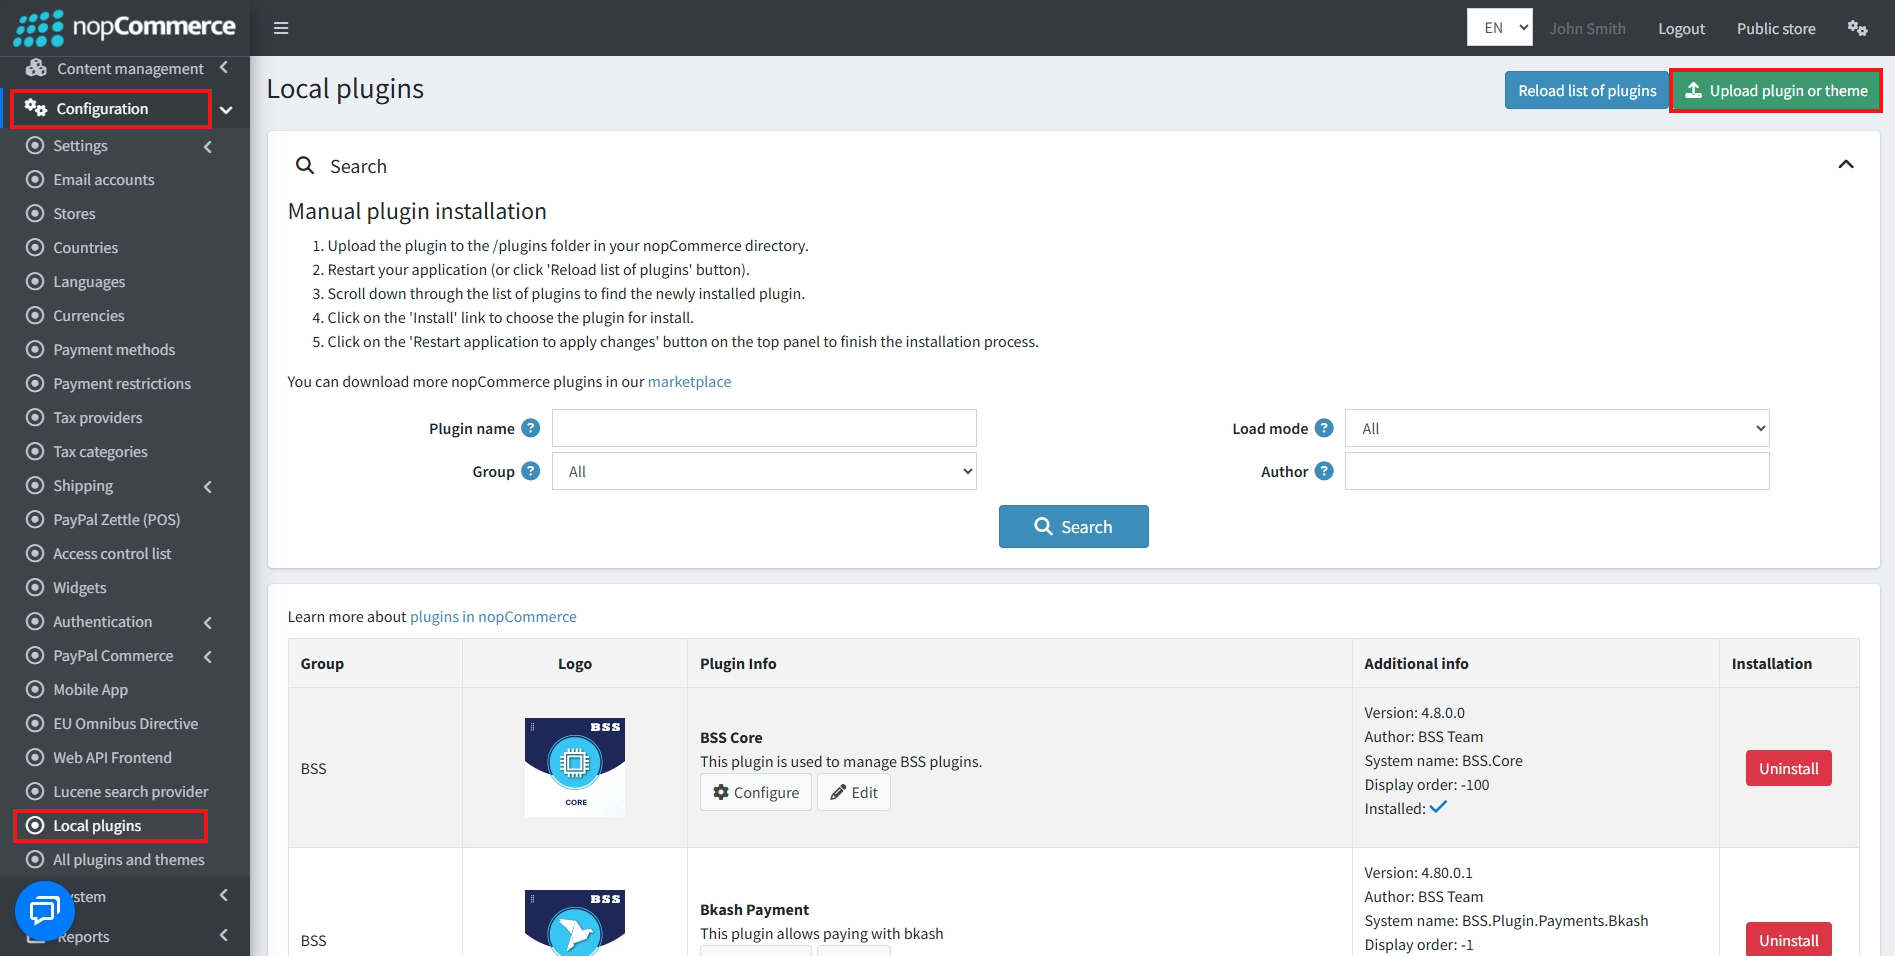
Go to Administration → Configuration → Local plugins
-
Within the bundle, you get all the required files, including BSS.Core
-
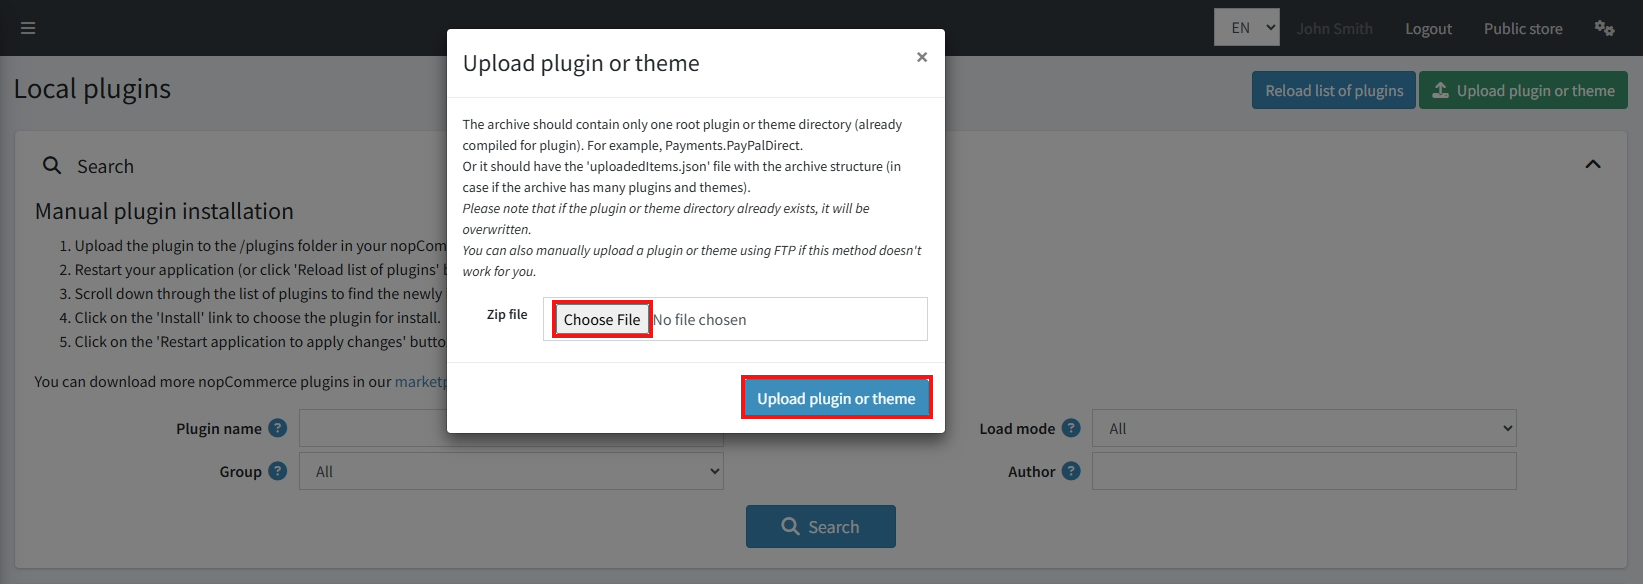
Upload the zip files using the 'Upload plugin or theme' button
-
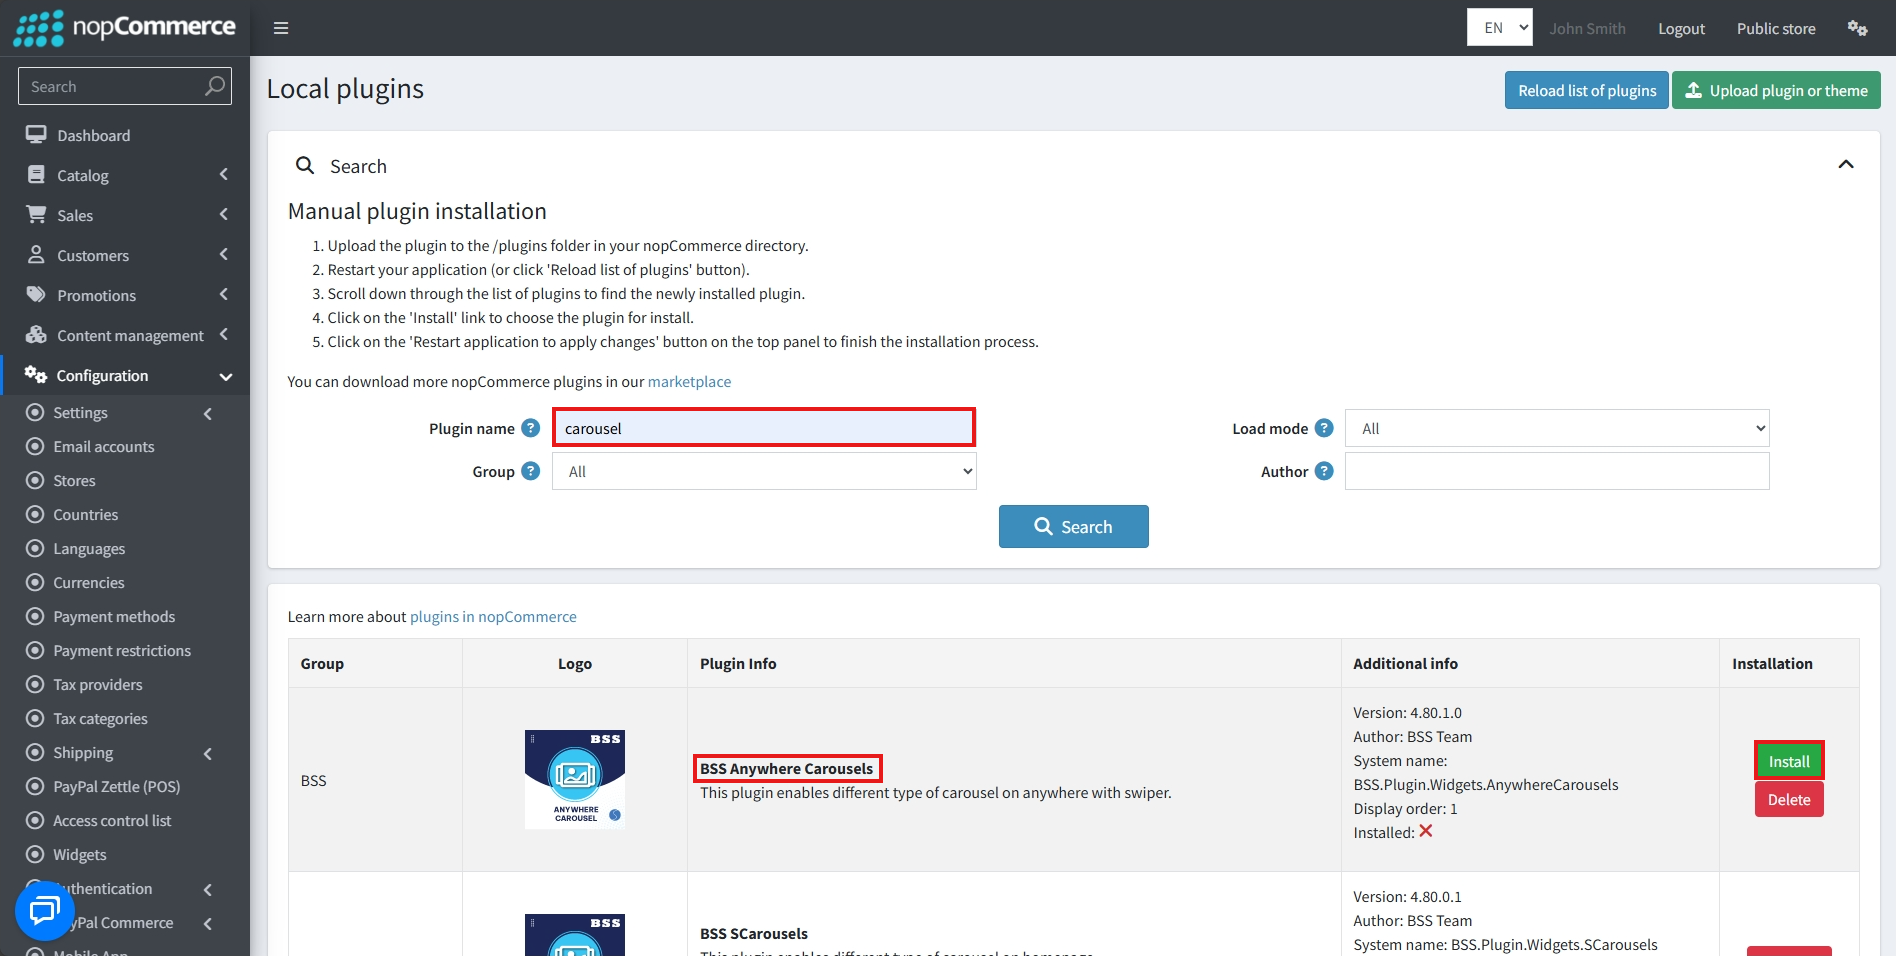
After uploading, install the 'BSS Core' Plugin first.
-
Then scroll down or write the name of the plugin in the search bar, and install 'BSS Anywhere Carousels'
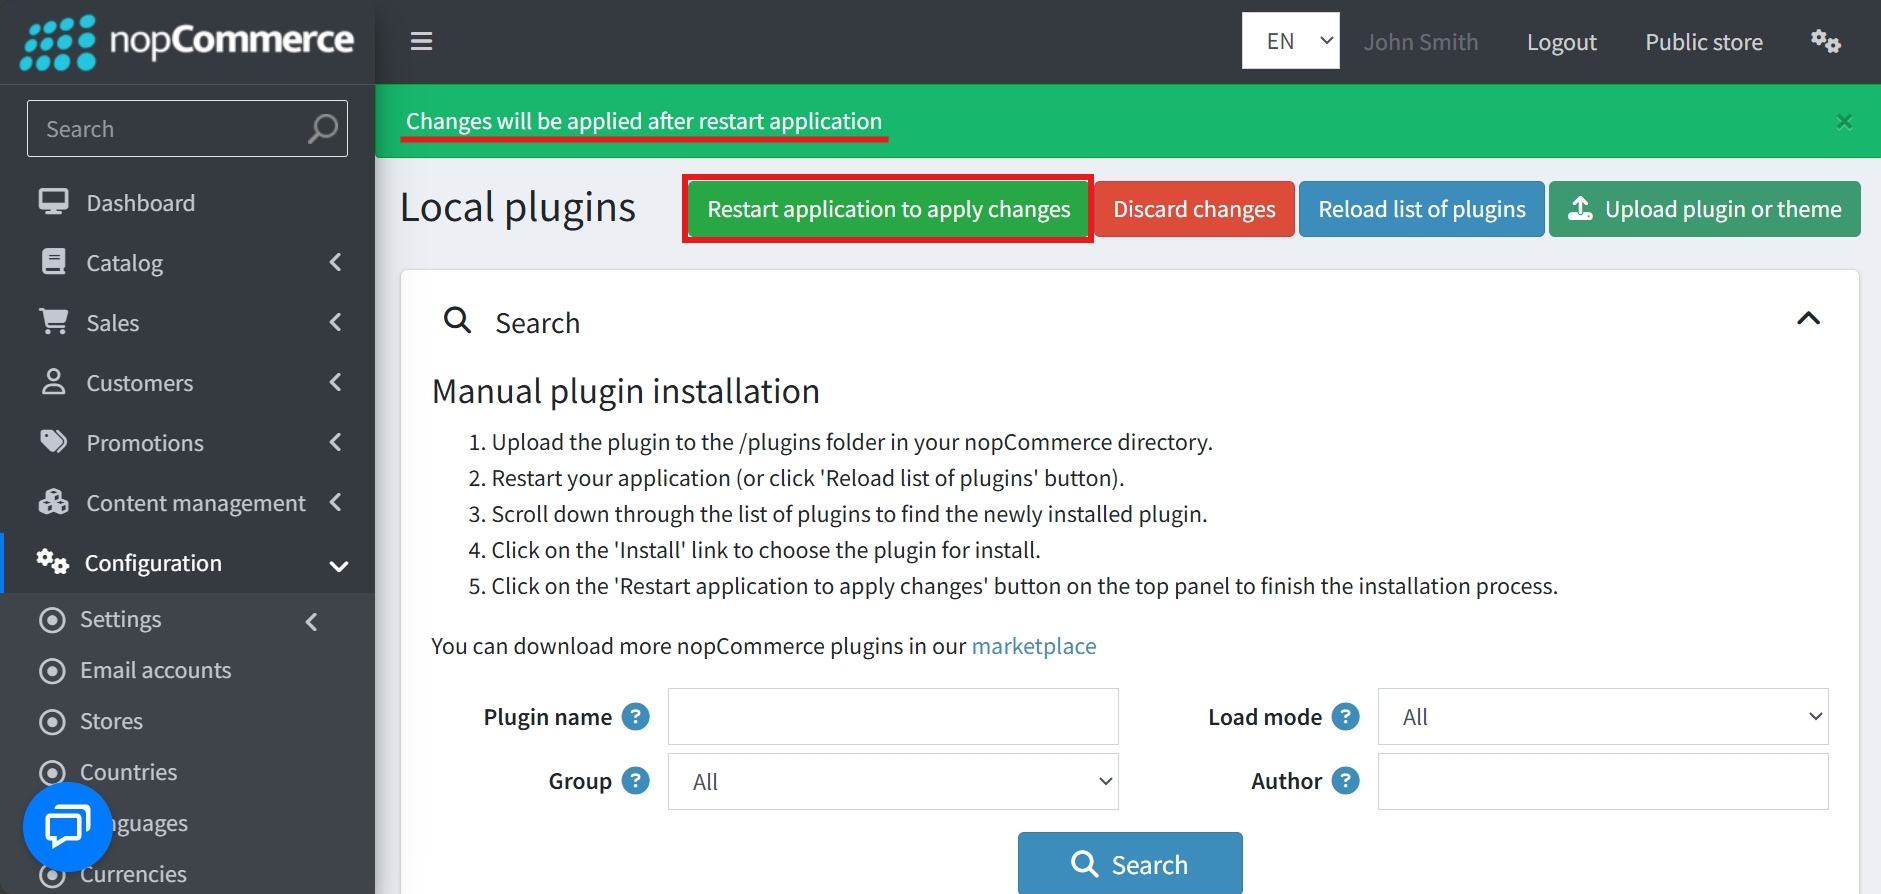
- To make the plugins functional, restart the application
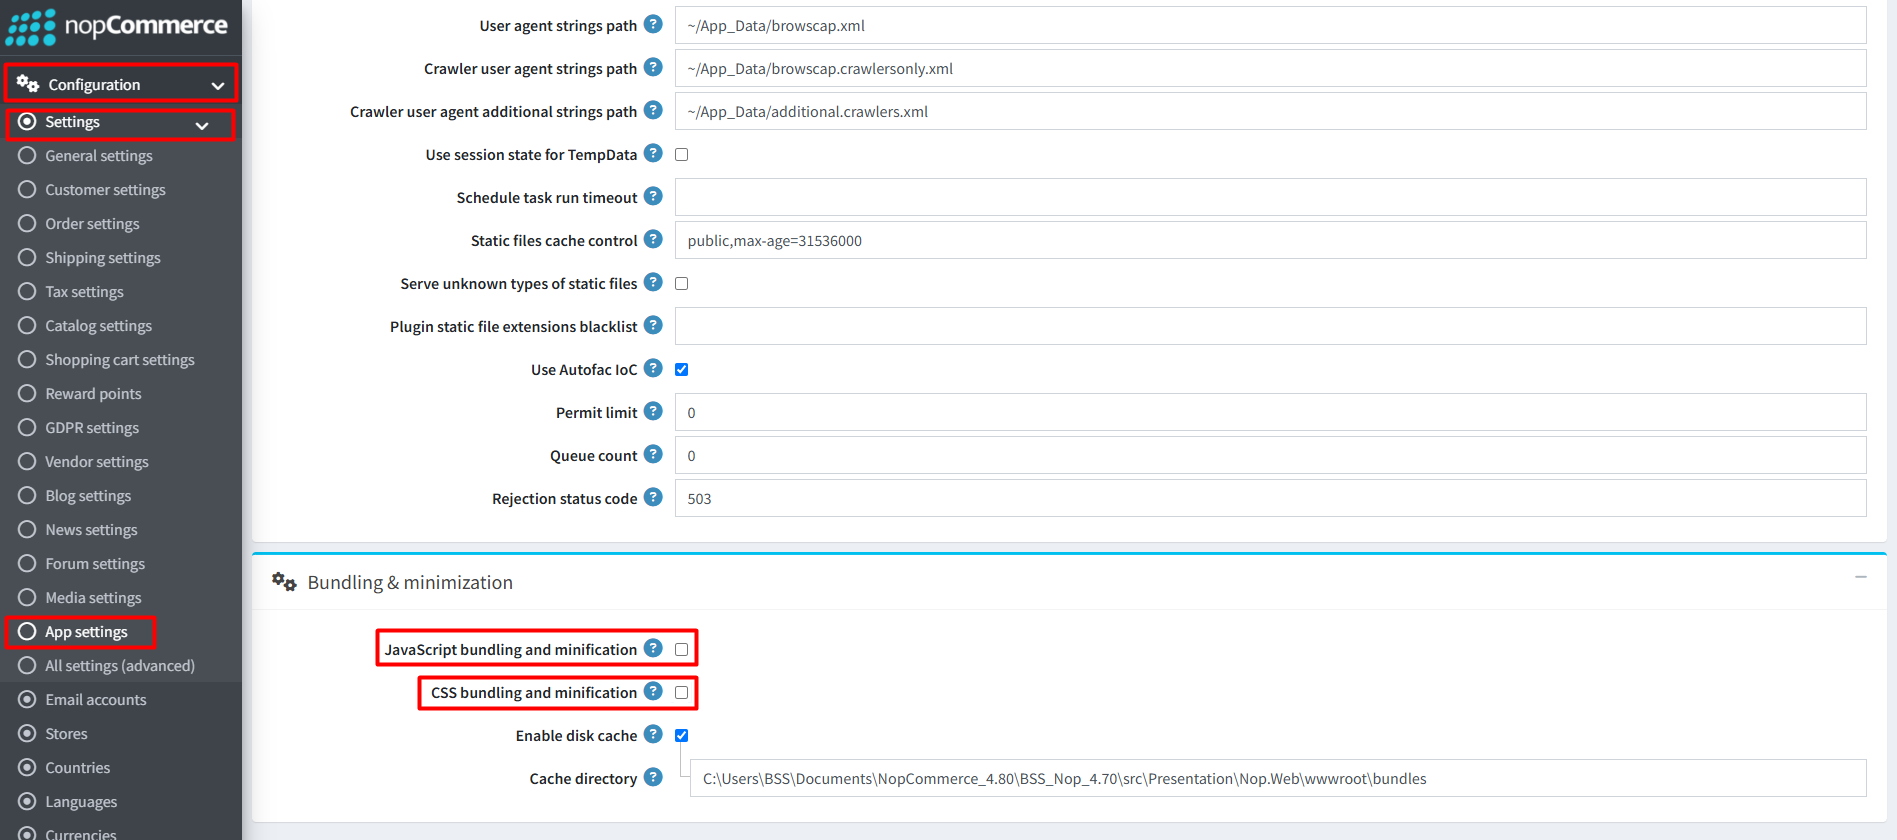
Recommendation: Go to > App Settings. If you find JavaScript bundling and minification, CSS bundling and minification are checked, then uncheck these two options and disable them.
CONFIGURE
-
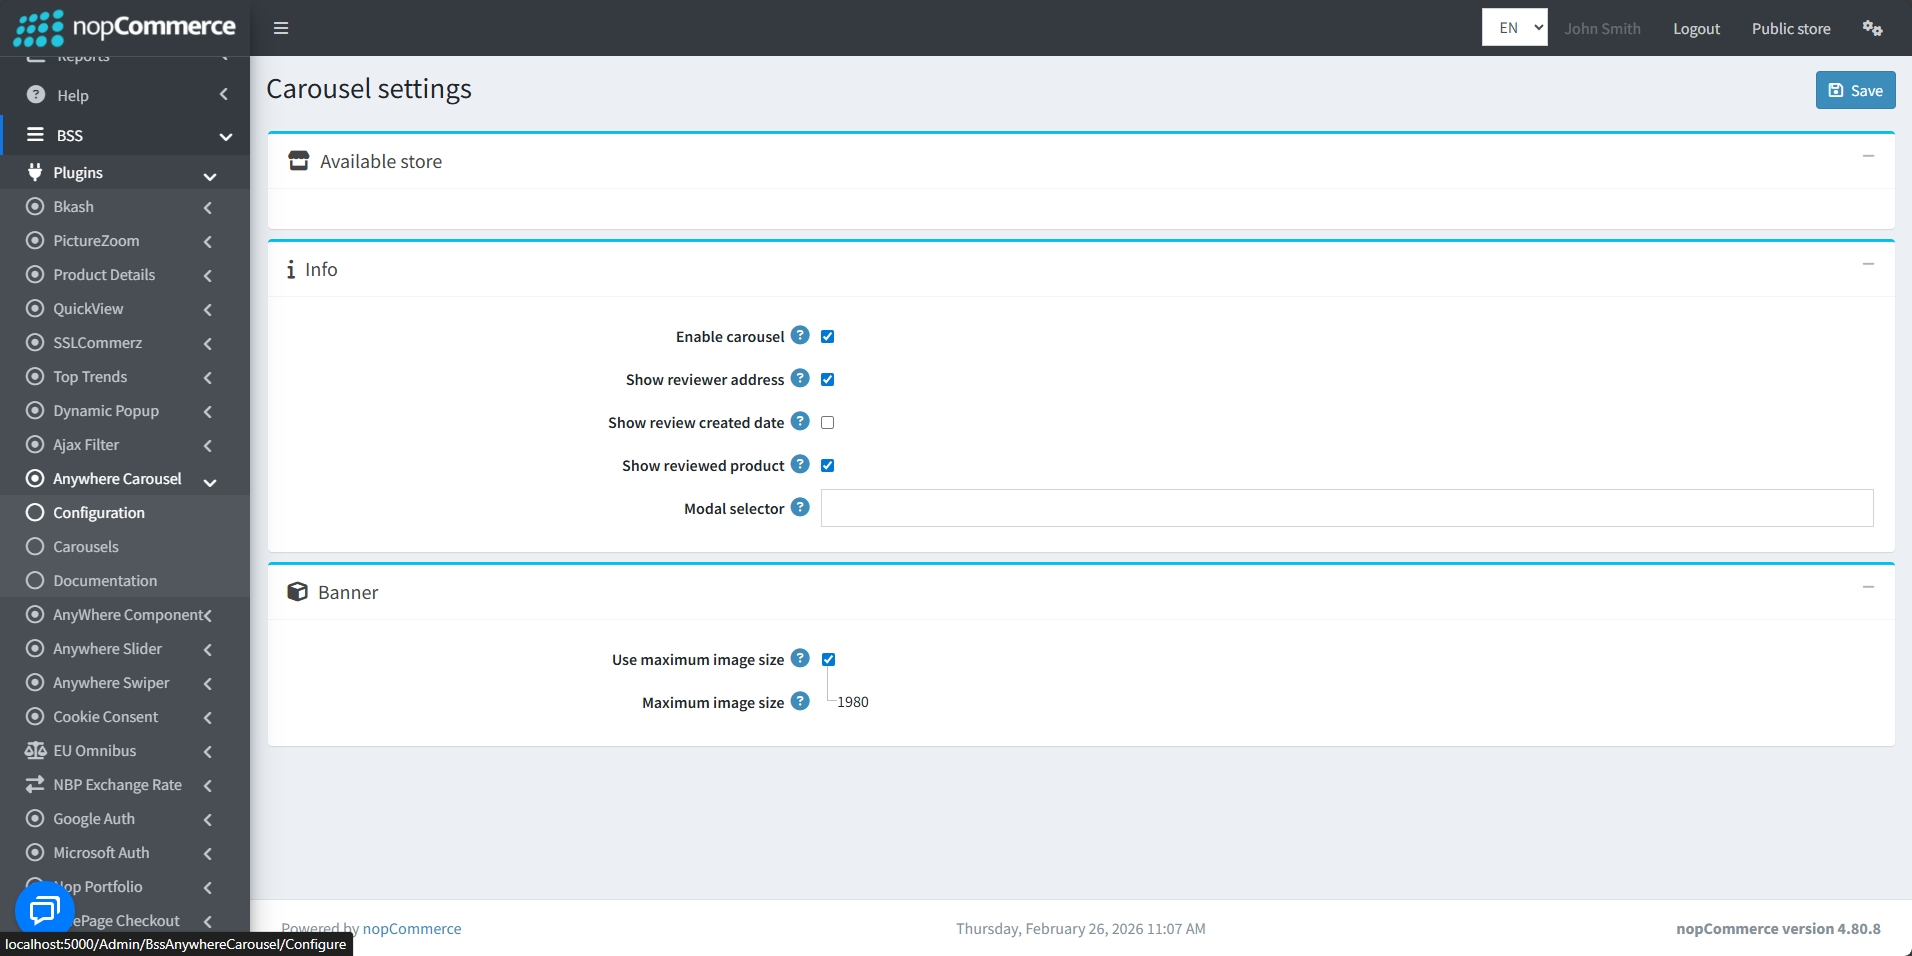
Go to Admin → BSS → Plugins → Anywhere Carousels → Configuration

-
Enter the License string and save it. Then clear cache.

-
Then again go to BSS → Plugins → Anywhere Carousels → Configuration to set the configuration.
-
Check the Enable carousel box to enable carousels
-
Enable Show reviewer address to display the address of the reviewer
-
Enable Show review created date to display the date the review was created on
-
Enable Show reviewed product to display the reviewed product
-
Check Use maximum image size box to set the maximum size of image uploads to 1980. Uncheck this box to set different image sizes for Desktop and Mobile view
-
Finally, click the Save button after setting all the conditions
CAROUSELS
-
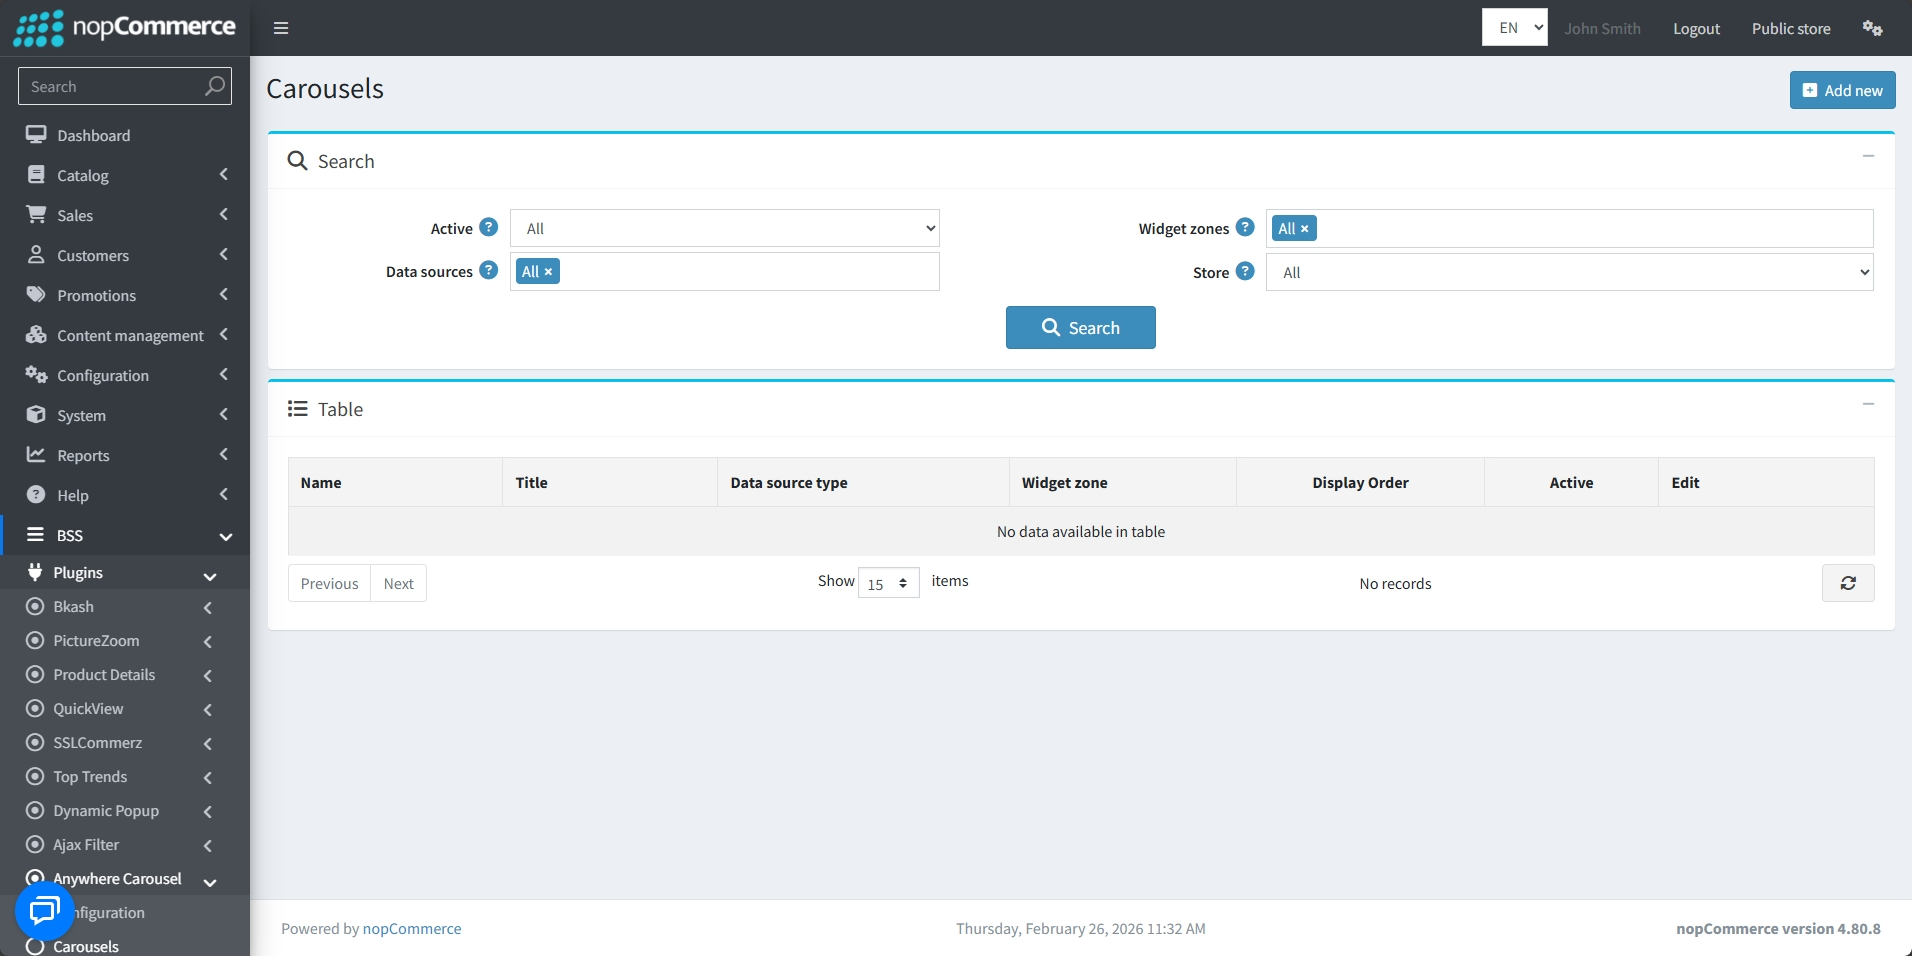
Go to BSS → Plugins → Anywhere Carousels → Carousels
-
The list of existing carousels and their details will be displayed
-
Carousels can be edited by clicking on the Edit button
-
Click on Add new to create a new Carousel
Info
-
Set the Name of the carousel.
-
Check the Active box to display the carousel.
-
Set the Title of the carousel.
-
Checking Display title will display the carousel's title on the public site.
-
A Custom URL may be provided to redirect users if they click on it.
-
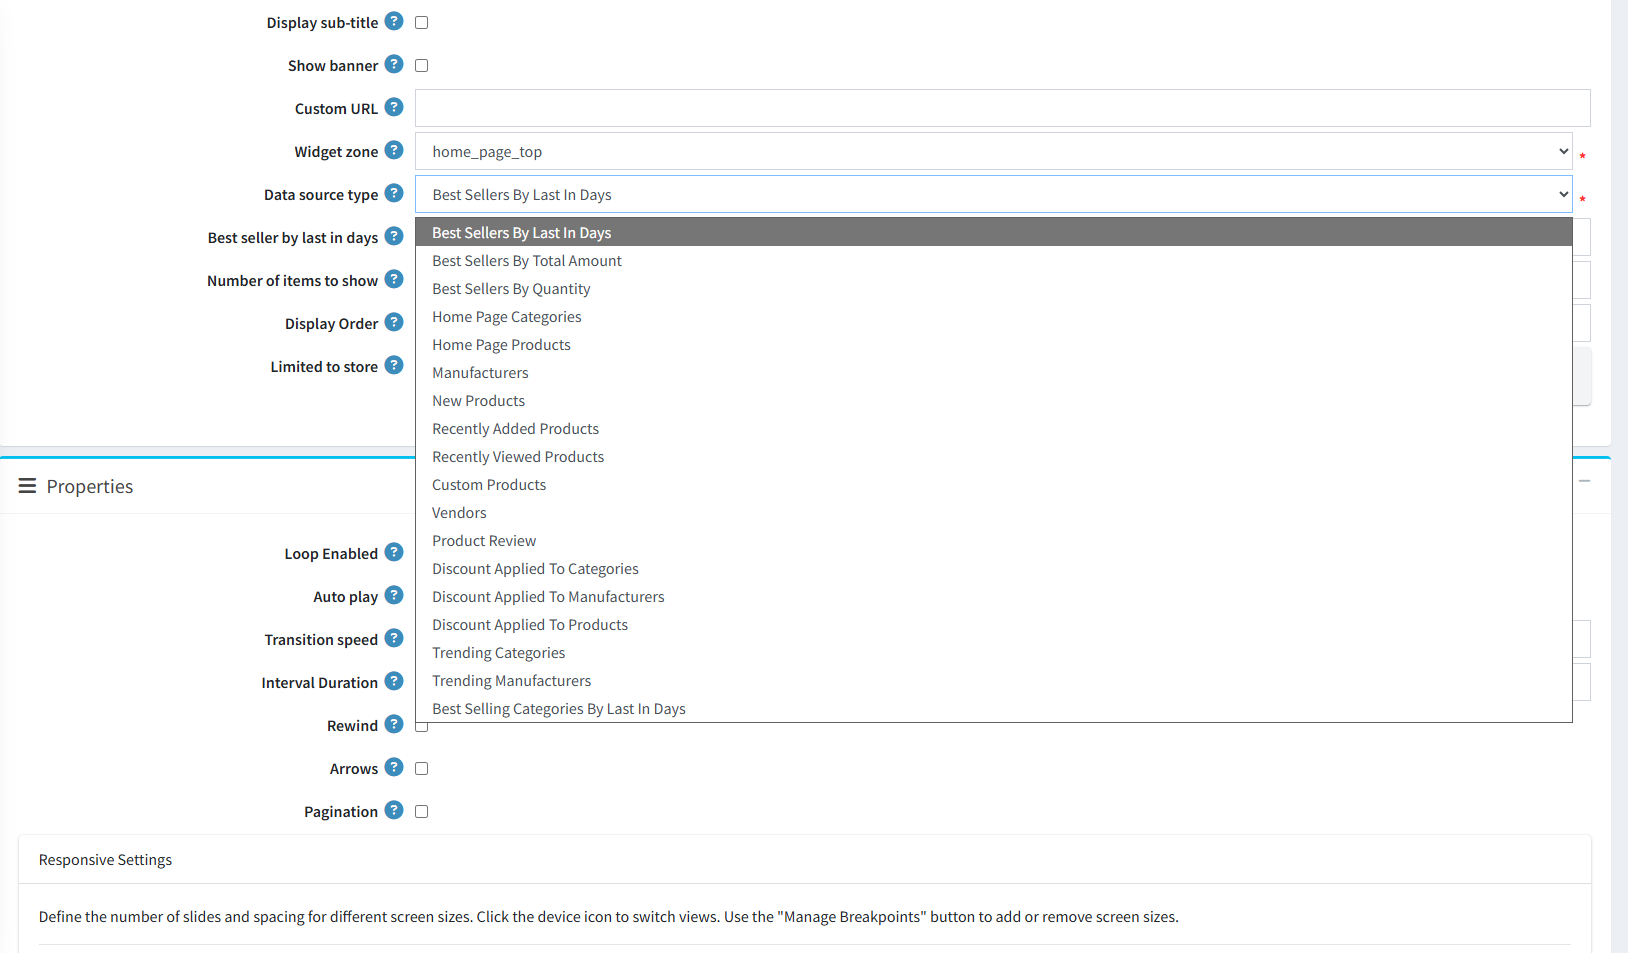
Setting the WidgetZone will determine the position of the carousel on the website. The carousel can be hooked to predefined areas of the site, such as ‘home_page_top,’ ‘home_page_bottom,’ ‘productdetails_bottom,’ etc.
-
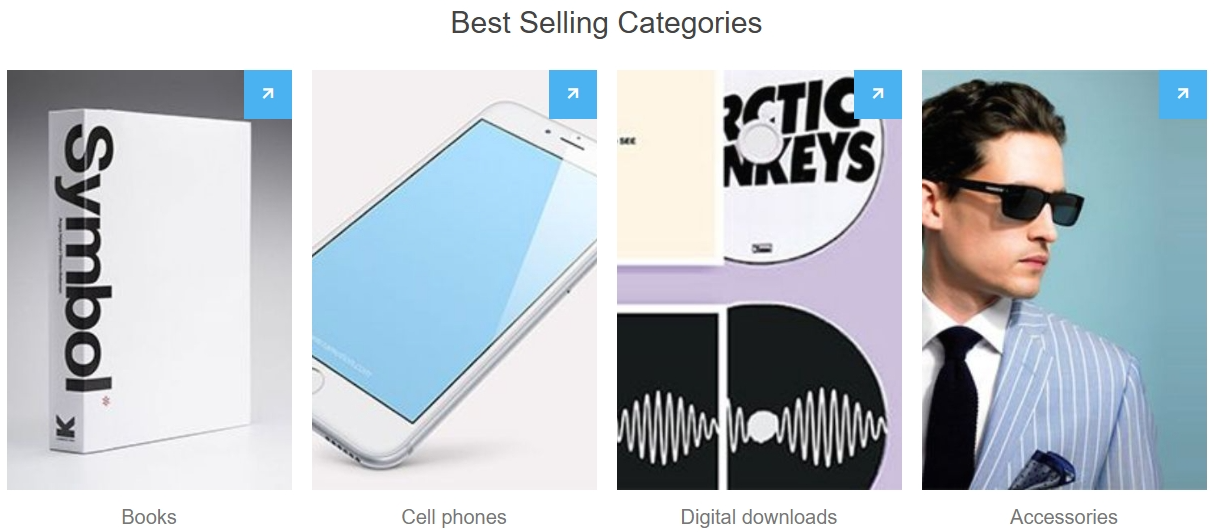
Selecting the Data source type will define what contents the carousel will display:
-
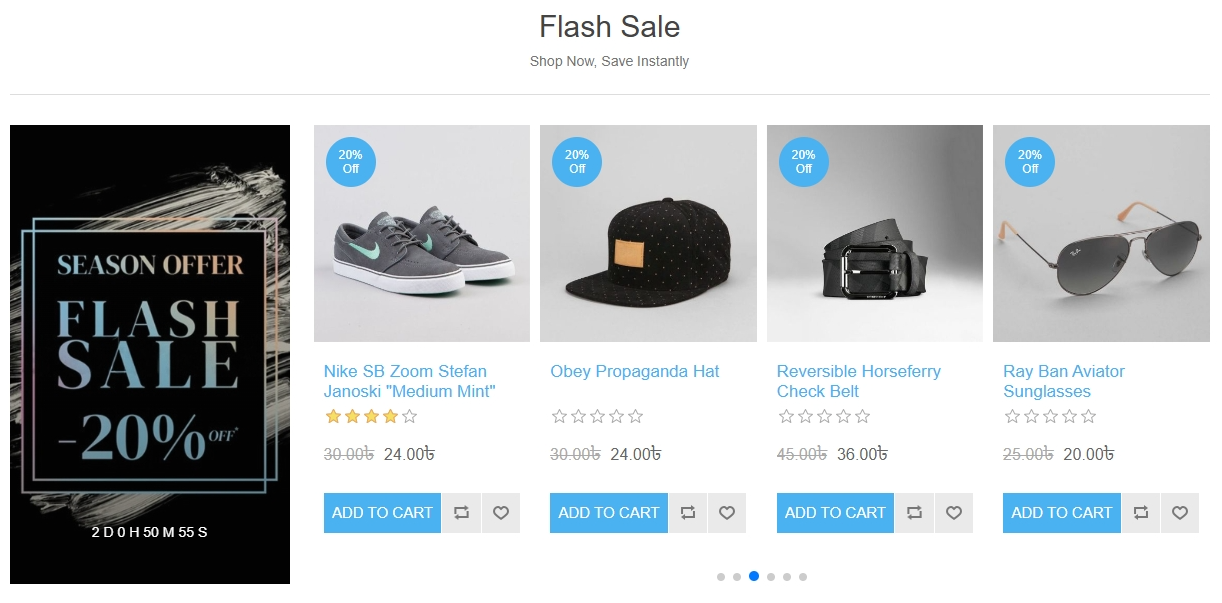
Discount Applied To Categories: Showcases products that have active discounts applied at the category level.
-
Discount Applied To Products: Directly displays individual products that have specific discounts or price reductions.
-
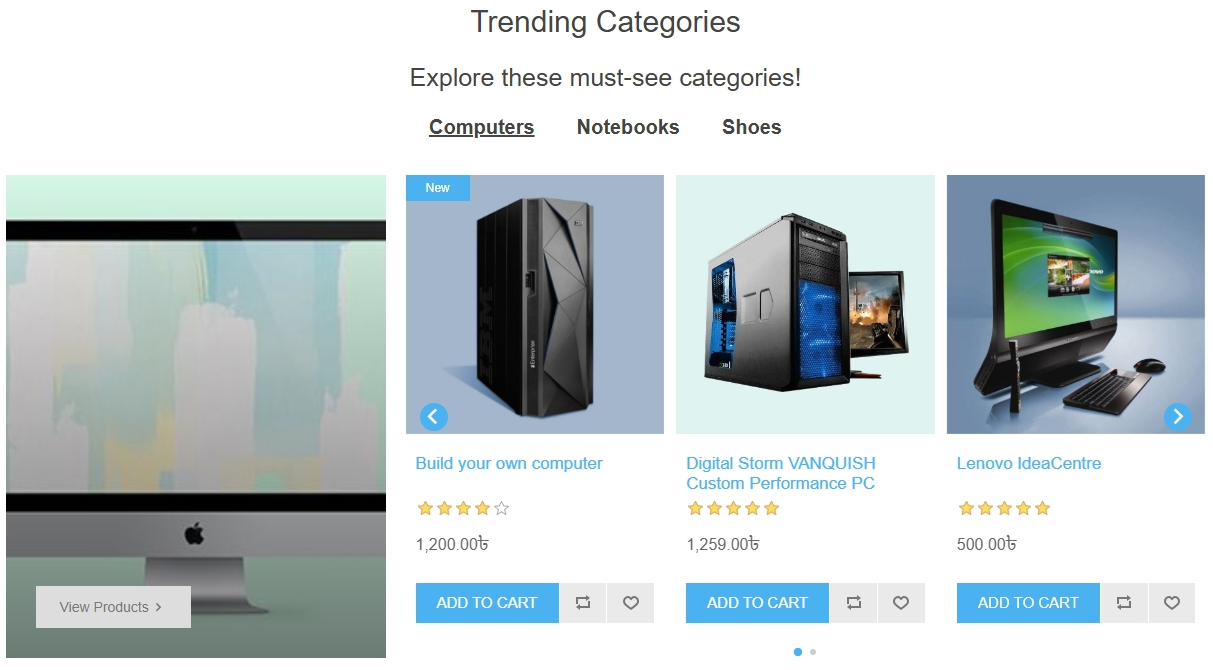
Trending Categories: Automatically populates the carousel with categories that have been designated as trending in the system.
-
Trending Manufacturers: Highlights specific brands or manufacturers that are currently marked as trending.
-
Best Selling Categories By Last In Days: Displays top-performing categories based on their sales volume within a specific period. When this is selected, you can use the Best seller by last in days field to set the timeframe (e.g., 30 days) used to calculate these results.
-
Sales & Home Page Highlights: Showcase Best Sellers (by timeframe, amount, or quantity) and specific items or categories designated for the Home Page.
-
Catalog & Brand Showcases: Highlight New and Recently Added Products or feature your store's Manufacturers and Vendors.
-
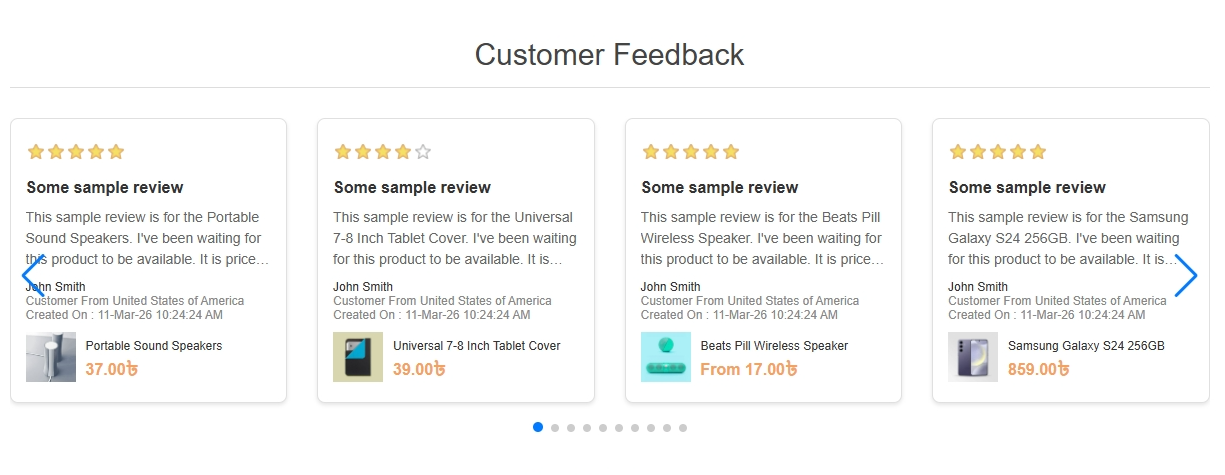
Engagement & Manual Control: Enhance customer engagement with Recently Viewed Products and Product Reviews, or gain full control by manually selecting Custom Products.
-
-
Number of items to show determines the number of items in the carousel.
-
Display Order determines the sequence of a particular carousel if multiple carousels are assigned to the same widget zone.
-
Limited to store restricts the visibility of the carousel to specific stores in a multi-store setup.

Properties
-
Animation and Interaction: Control how the carousel behaves by checking Loop Enabled for continuous scrolling, Auto play for automatic transitions, and Rewind to return to the beginning once the end is reached. You can further refine the movement by setting the Transition speed (e.g., 1500ms) and the Interval Duration (e.g., 2500ms) between slides.
-
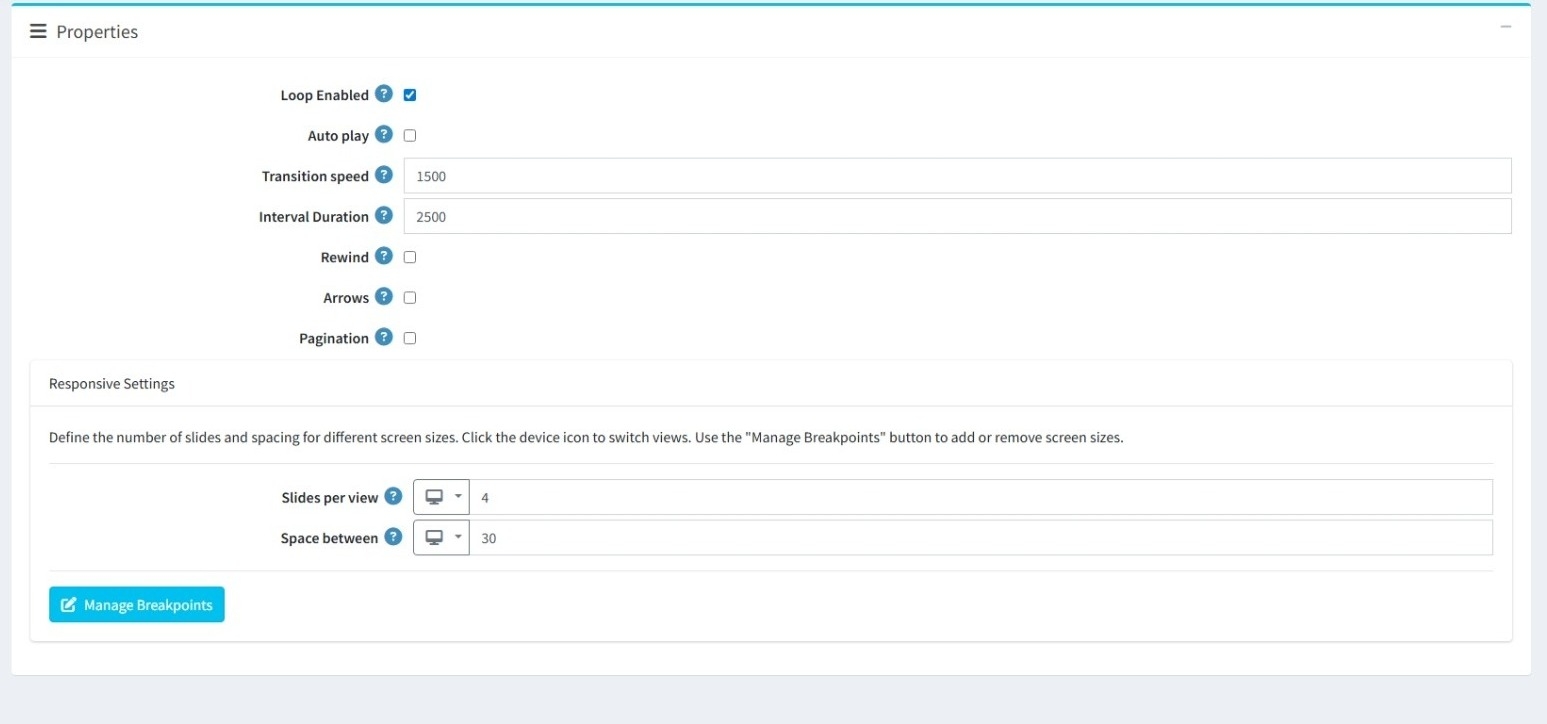
Navigation Elements: Enhance user control by checking Arrows to display side navigation and Pagination to show progress indicators at the bottom of the carousel.
-
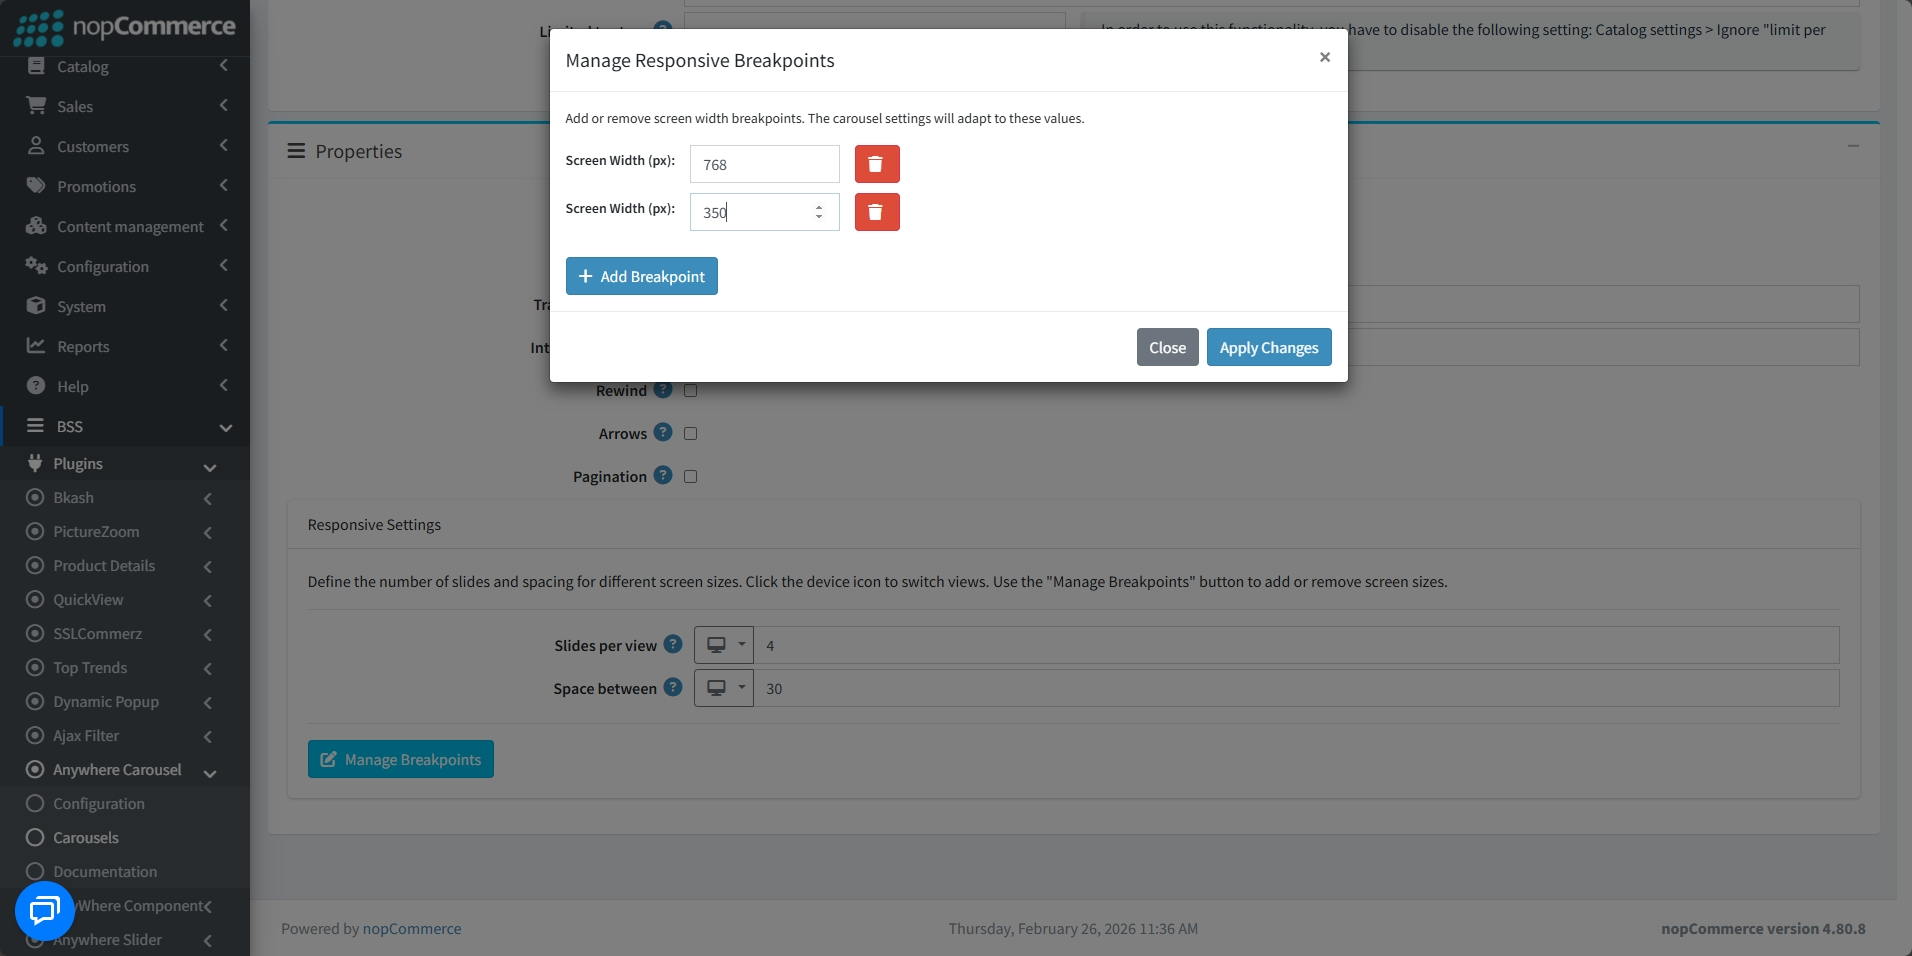
Responsive Settings: Optimize the display for different devices by defining the Slides per view and the Space between items. By clicking the device icon, you can switch views to configure these settings for specific screen sizes. To add or remove breakpoints, click on the Manage Breakpoints button.
-
The Manage Breakpoints button opens a configuration modal where you can add or remove specific Screen Width (px) values. This allows the carousel's layout and behavior to adapt dynamically to the defined screen sizes, ensuring a responsive experience across mobile, tablet, and desktop views.
-
Click on Add Breakpoint to add a new breakpoint.
-
Click on the Delete button to remove a breakpoint.
-
Finally, click on Apply Changes to save the breakpoints.
PUBLIC VIEW

FEATURES
-
It is easy to install and configure from the admin interface.
-
It supports multi-store visibility, allowing you to restrict carousels to specific store instances.
-
Utilizes Lazy Loading and a Dynamic Skeleton Loader to optimize image delivery for faster page loads, reduce CLS (Cumulative Layout Shift), and maintain a smooth, visually stable browsing experience.
-
Supports an extensive range of dynamic data sources, including Best Sellers (by sold in days), Trending Categories, Trending Manufacturers, Recently Viewed items, Product Reviews, and various Discount-based collections.
-
Allows for flexible placement across the website using a variety of predefined widget zones.
-
Provides advanced animation and behavior settings such as Loop Enabled, Auto play, Rewind, and customizable Transition speeds.
-
Includes configurable navigation elements, allowing you to enable or disable Arrows and Pagination.
-
Allows for Custom URLs to redirect users to specific pages when they click on the carousel.
-
Includes a Manage Breakpoints feature to add or remove custom screen sizes for precise layout control across all devices.